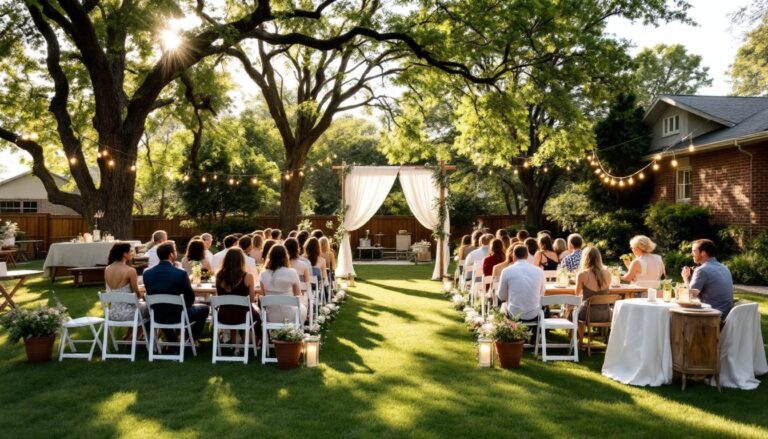
An L-shaped backyard can feel awkward, one arm too narrow, corners hard to use, sight lines broken. But that shape isn’t a limitation: it’s an opportunity. With smart zoning, thoughtful furniture placement, and intentional landscaping, you can turn an unconventional layout into your home’s most versatile outdoor room. Whether you’re hosting gatherings or creating a peaceful retreat, an L-shaped yard rewards strategic planning. Here are seven practical ideas to help you reclaim every square foot and make your backyard work harder for you.
Table of Contents
ToggleKey Takeaways
- Transform your L-shaped backyard by dividing it into distinct functional zones—one for entertaining and one for gardening or relaxation—that turn the awkward shape into an architectural advantage.
- Map your yard on paper before starting any project, noting sun exposure, drainage, and sightlines to avoid cramped or disjointed zones and save time during installation.
- Position your main patio or seating platform at the corner junction of the L where it naturally offers shelter, views down both arms, and acts as the hub of your backyard.
- Create clear pathways 3 to 4 feet wide with slight slope for drainage to connect zones and improve flow, using materials like permeable pavers or gravel to define transitions between spaces.
- Use raised garden beds, tiered plantings, pergolas, and strategic lighting to maximize your garden arm and softly illuminate corner features, extending functionality and enjoyment into evening hours.
Divide And Conquer: Creating Multiple Zones In An L-Shaped Yard
The key to an L-shaped backyard is treating each arm as a distinct zone rather than fighting the irregular shape. One arm might become an entertainment area, while the other serves as a quiet garden or play zone. This separation transforms a layout problem into an architectural advantage, you get privacy and functionality in a single yard.
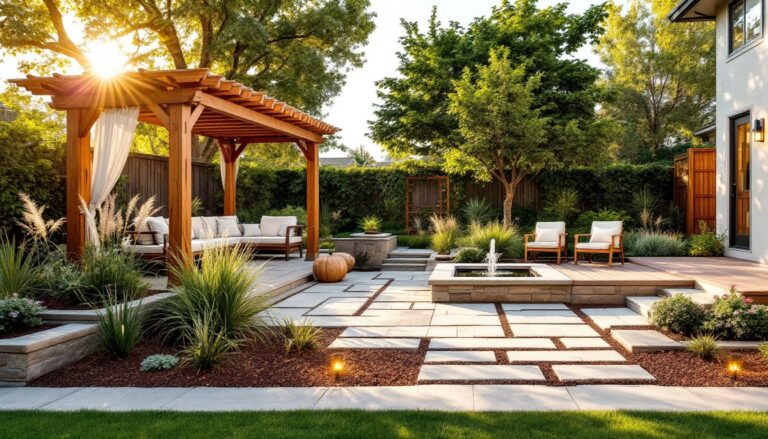
Defining Functional Areas With Landscaping And Hardscaping
Use hardscaping to anchor each zone visually and physically. A patio or deck in the first arm establishes your main gathering space: a gravel or stepping-stone path in the connecting corner guides movement and signals the transition. In the second arm, add raised beds, a small seating nook, or a water feature. The boundary between zones doesn’t need a fence, low hedges, planters, or a pergola can define space without blocking views or airflow.
Start by mapping your yard on paper. Note sun exposure (patio areas want afternoon shade in hot climates), drainage patterns (low spots collect water), and where neighbors’ sightlines fall. A shed or storage structure tucked into the far corner of one arm can serve double duty: practical storage plus a visual anchor. Use materials consistently, if your patio is composite decking, echo that material in the path or planter boxes for cohesion. Many homeowners skip this planning step and end up with disjointed, cramped zones. Take two hours with a tape measure and a pencil. You’ll save headaches later.
Patio And Seating Solutions For Corner Advantages
The corner where your L’s two arms meet is prime real estate. It’s naturally sheltered, offers views down both arms, and typically catches good light at certain hours. A corner patio or seating platform here becomes the hub of your backyard.
Positioning Furniture To Maximize Sight Lines And Flow
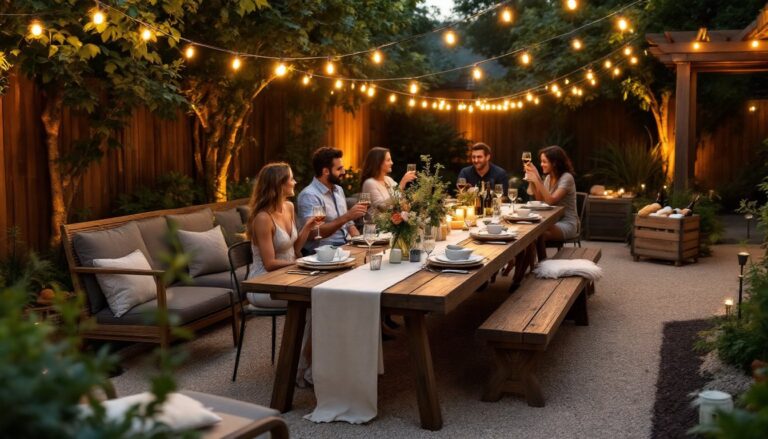
If you’re pouring a patio, aim for at least 12×14 feet (the minimum for comfortable seating plus table). Smaller than that, and you’ll feel cramped with just four people. Orient seating to face into the yard, not back toward the house, you want to enjoy the garden you’ve built. Avoid lining furniture against walls: instead, float seating groups with the longest sightline down one arm of the L. This arrangement creates an open, inviting feel instead of a cramped patio-box vibe.
For furniture, consider pieces designed for L-shaped spaces. An L-shaped outdoor sectional or two separate benches arranged in an L echo your yard’s shape and maximize seating without feeling forced. Add a fire table or outdoor heater to anchor the center and extend the season into fall and spring. Position grills and serving areas off to one side so they don’t block views or create traffic jams in the middle. Small Backyard Entertaining areas work best when pathways are clear and sight lines are unobstructed.
Garden Layouts That Embrace The L-Shaped Design
One arm of your L is perfect for growing vegetables, herbs, or ornamentals without eating into your social space. A series of raised beds (typically 2×4 feet or 4×8 feet) arranged in one arm creates an organized, low-maintenance garden that’s easier on your back than in-ground beds. Pressure-treated cedar, composite, or vinyl-clad wood lasts 10+ years with minimal upkeep.
If you prefer perennials and shrubs, layer plantings by height to maximize the visual space. Place tall plants (ornamental grasses, small trees) toward the back or in corners: mid-height shrubs in the middle: and low groundcover or edging plants at the front. This tiered approach makes a narrow arm feel deeper and prevents the garden from blocking sightlines. Homedit showcases several award-winning residential garden designs that use similar tiered planting to maximize small spaces.
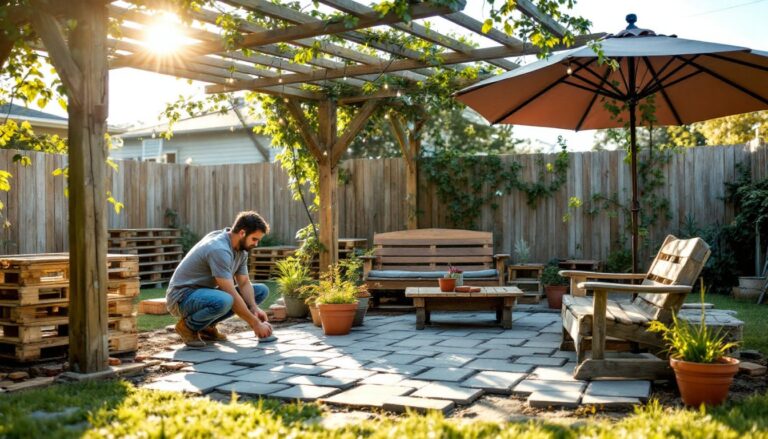
Consider a small seating nook within the garden arm, a bench under a pergola surrounded by flowering plants creates an intimate retreat separate from your main patio. Paint or stain the pergola to tie it to your house or patio material. Most DIYers can build a simple 8×8 pergola with 4×4 posts, 2×6 joists, and 2×2 slats in a weekend: if structural work makes you nervous, hire it out. The payoff is a quiet spot that feels like your own secret garden.
Pathways And Transitions That Guide Movement
Movement is everything in an L-shaped yard. Without a clear path connecting zones, your backyard feels disconnected and awkward. A 3- to 4-foot-wide path from your house through the corner into the second arm gives natural flow and prevents the awkward “walking through the patio” problem.
Material options are broad. Pea gravel is affordable and DIY-friendly but needs raking and occasional top-offs: permeable pavers cost more upfront but last 20+ years with no weeding: stepping stones work for low-traffic areas. Whatever you choose, slope it slightly (1% grade, roughly 1 inch per 8 feet) to shed water away from patios and structures. In rainy climates, add a perforated drainage pipe beneath gravel paths to prevent pooling.
The corner transition is crucial. Widen the path slightly at the turn to signal a shift in function. A change in material, switching from pavers to gravel, or vice versa, also marks the threshold between zones visually. Avoid creating dead-end paths that lead to an unused corner: instead, loop pathways so they guide you through the space and back toward the house. Backyard Designs for Entertaining often feature pathways that improve flow and encourage movement through the entire yard.
Lighting And Landscaping To Enhance Every Corner
L-shaped yards create shadowed corners and awkward nooks that vanish at dusk. Strategic lighting solves this problem while extending evening enjoyment. String lights or Edison bulbs strung overhead create ambiance over your main patio: deck or recessed lights mounted on the patio’s edge add functional illumination without glare.
For the garden arm, uplighting (aiming lights up at plants or structures) highlights focal points and adds drama. Path lights spaced 3 to 4 feet apart guide movement safely and delineate zones. Install lights on a low-voltage system (12-volt transformer from standard 110-volt outlet) for easy DIY installation and minimal power draw. No digging trenches or running conduit, most low-voltage lights come with simple stakes and plug into a weatherproof outlet. For areas without outlets, solar path lights require zero wiring but deliver less brightness: use them as supplements, not primary sources.
Landscaping complements lighting to soften hard edges and fill awkward corners. A privacy screen of tall ornamental grasses or bamboo (check local invasiveness rules on running bamboo) along one side creates a living backdrop and can hide an ugly fence or neighbor’s view. Flowering shrubs like hydrangeas or butterfly bush add color and seasonal interest. Award-winning coastal gardens demonstrate how thoughtful plant selection and placement can transform challenging spaces into destinations. In tight corners where plants struggle, a small water feature or sculpture provides focal interest without maintenance headaches. Place it where it catches light in the evening, it’ll draw the eye and make that corner feel intentional, not leftover.